Thesis: Exhibition
PROJECT OVERVIEW
- Project Duration: 1.5 yrs
- Project Time: Est. 800 hrs
- Focus: Character Creation Methodologies
- Software: ZBrush, Maya, 3DSMax, Marvelous Designer, Substance Painter, Photoshop, Marmoset, UE4
------------------------------------------------------------------------------------
PROJECT GOAL(s):
I chose this project as a way to improve my character creation process as well as to give myself the chance to actually create an in-depth and long-term project. The main goals, or “Pillars of mastery” were: Cyberpunk/Western Aesthetics, Translating 2D Concepts into Stylized 3D, and Converting Stylized to Realism. Additionally, I also wanted to place a key emphasis on generating clean, animation-friendly topology, material/texture creation, and staying below a certain tricount.

PILLAR I: Cyber/Western Aesthetics & Concepting
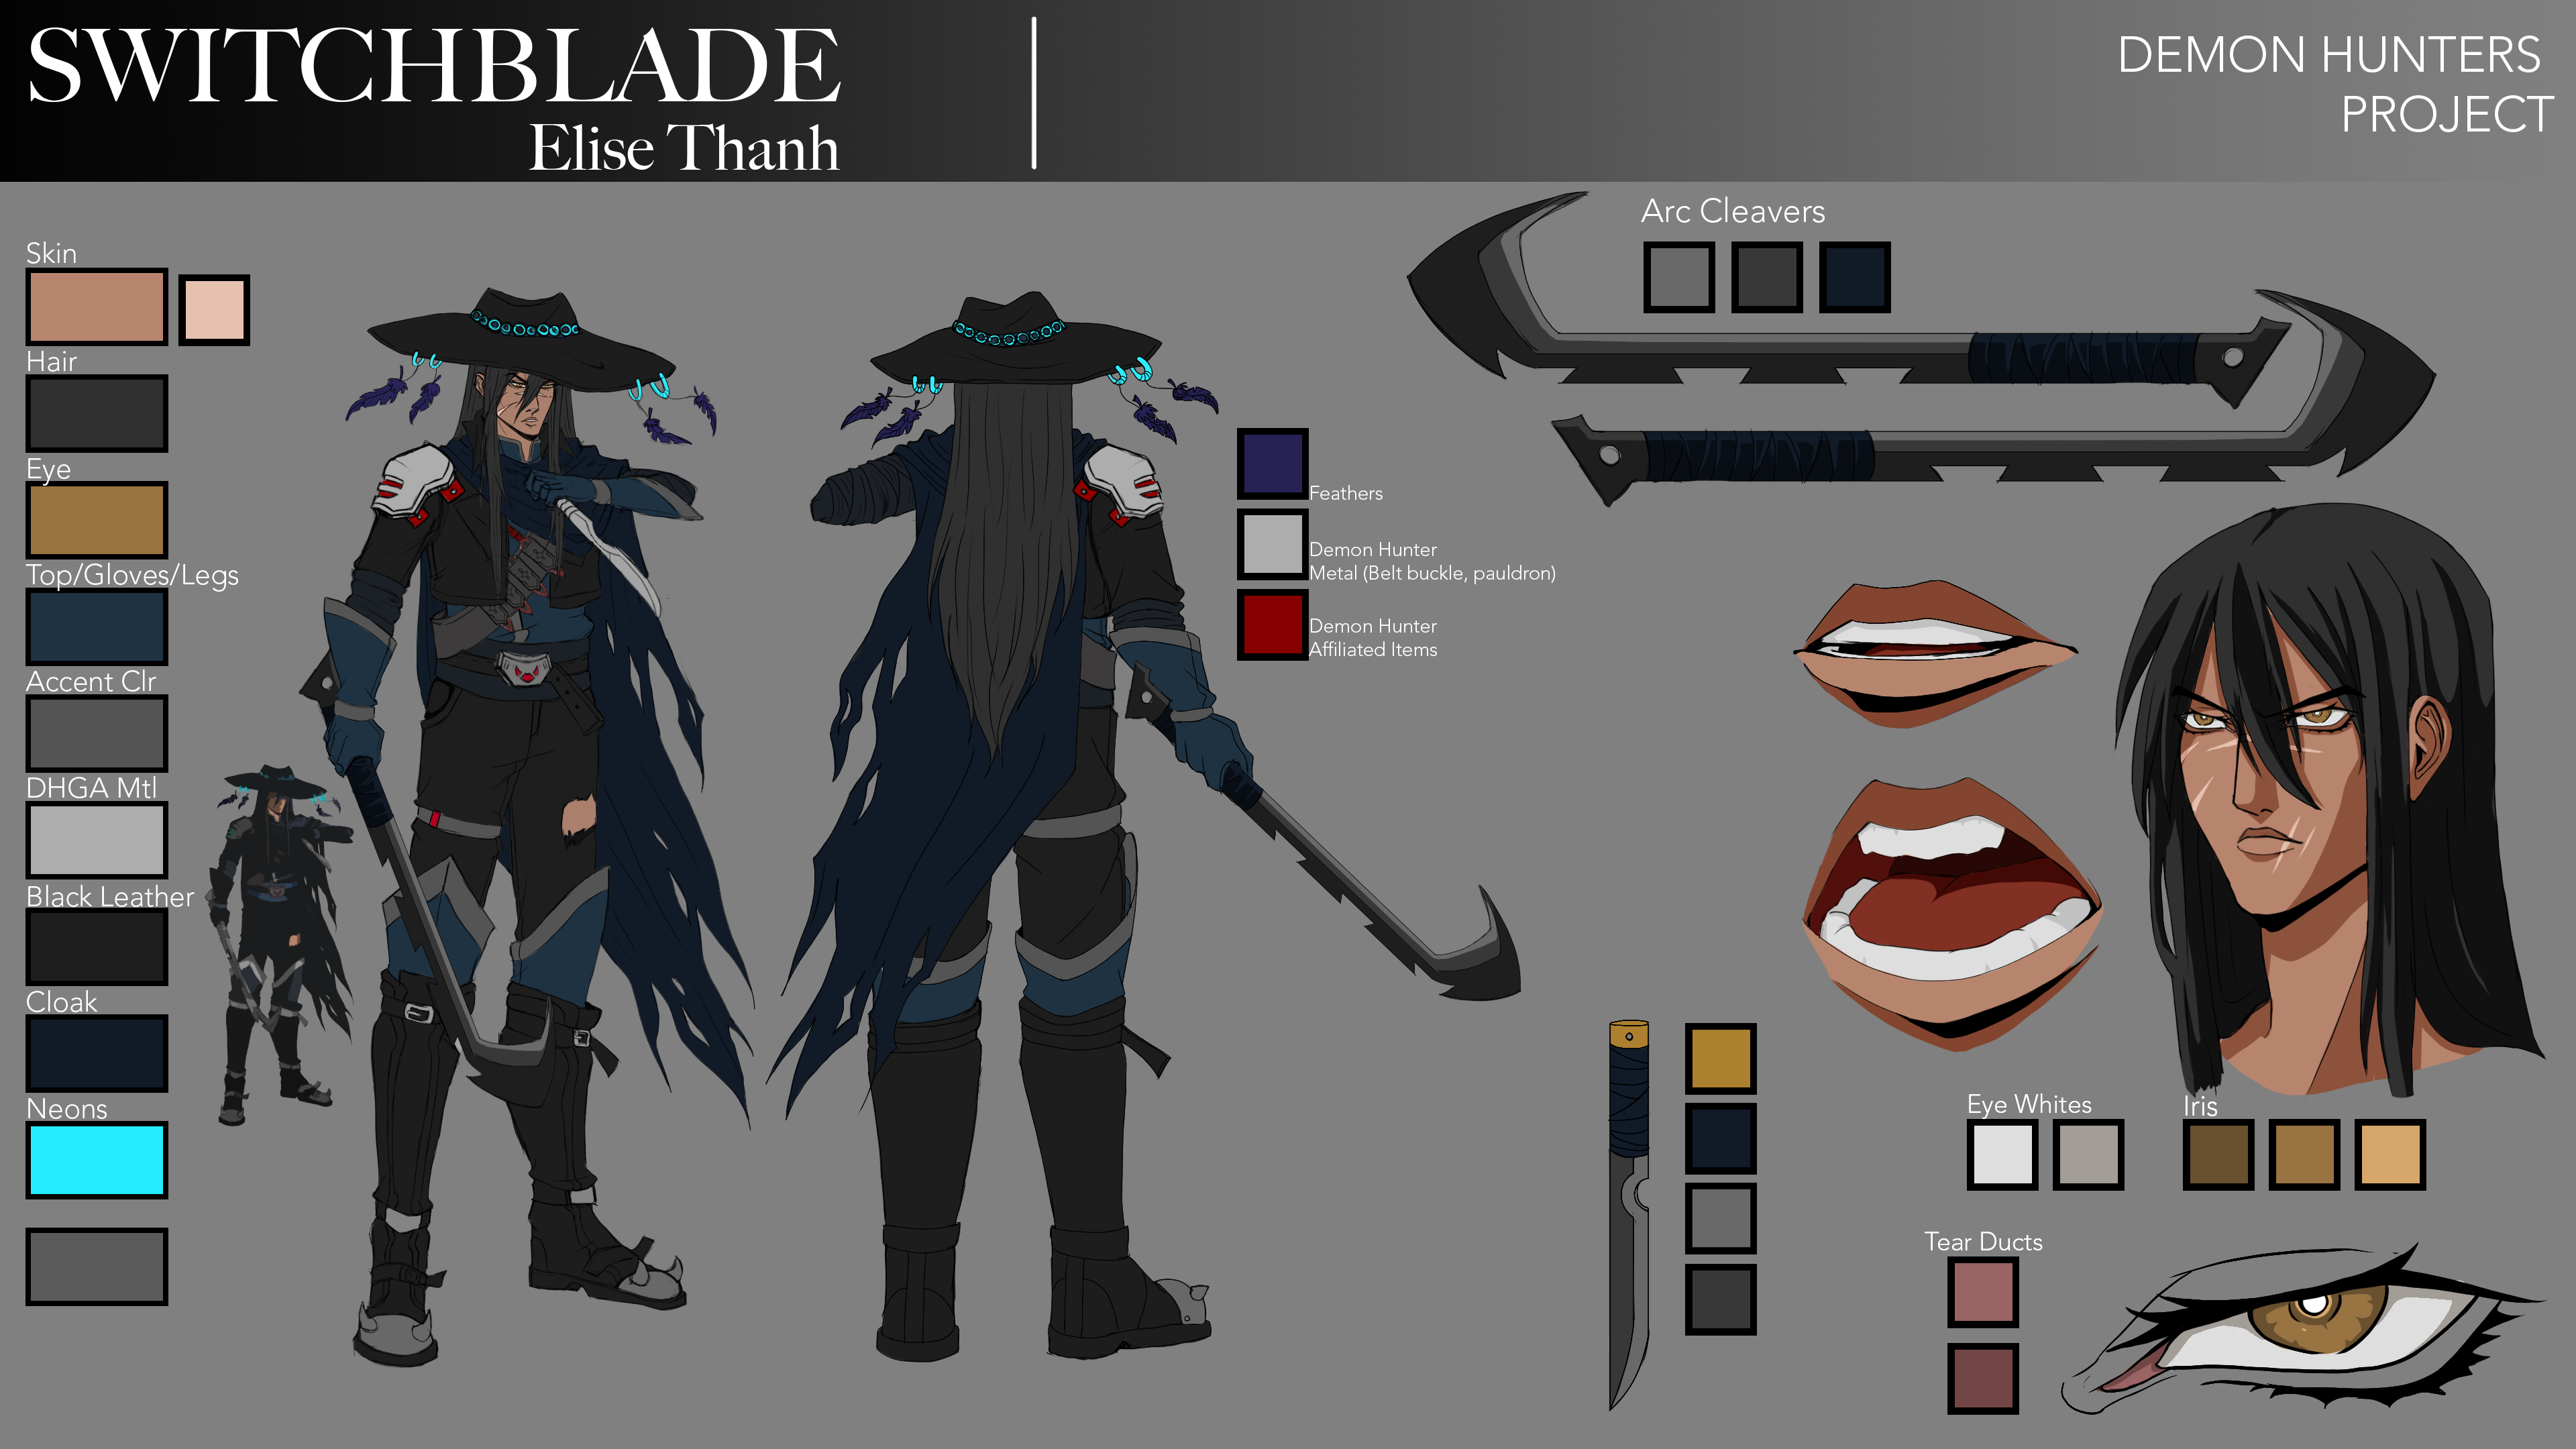
My first pillar's pre-production included the detailed study and breakdown of Powerhouse Animation Studio's Castlevania (2017) style, research into Cyberpunk and Western aesthetics/tropes, and 2D iterative design.
Here is my preliminary breakdown of Castlevania's character sheet for Trevor Belmont:


I spent a few weeks learning to adapt the Powerhouse style in my own work, which greatly increased my understanding of how to design my characters following their conventions as well as what I would need to focus on when working on the 3D stylized models.
PILLAR I: Research
During my preliminary research, I focused on finding a lot of fashion and style references on various sites (Pinterest, Artstation, Clothing brands) as well as how existing media set in these genres approaches their costume design. I referenced movies, shows, and games during this reference gathering period: Westworld, Altered Carbon, Red Dead Redemption 2, and Cannon Busters were the primary ones that I would always refer to. I also brought in other influences such as motorcycle wear (Harley Davidson) and costuming trends from FFXIV and Bloodborne.
In all designs I chose to integrate a combination of styles to pull a cohesive look together. Some elements changed from the 2D concepts to translate better in 3D design. (Such as Switchblade's cloak/cape)


PILLAR II: Translating 2D to Stylized 3D
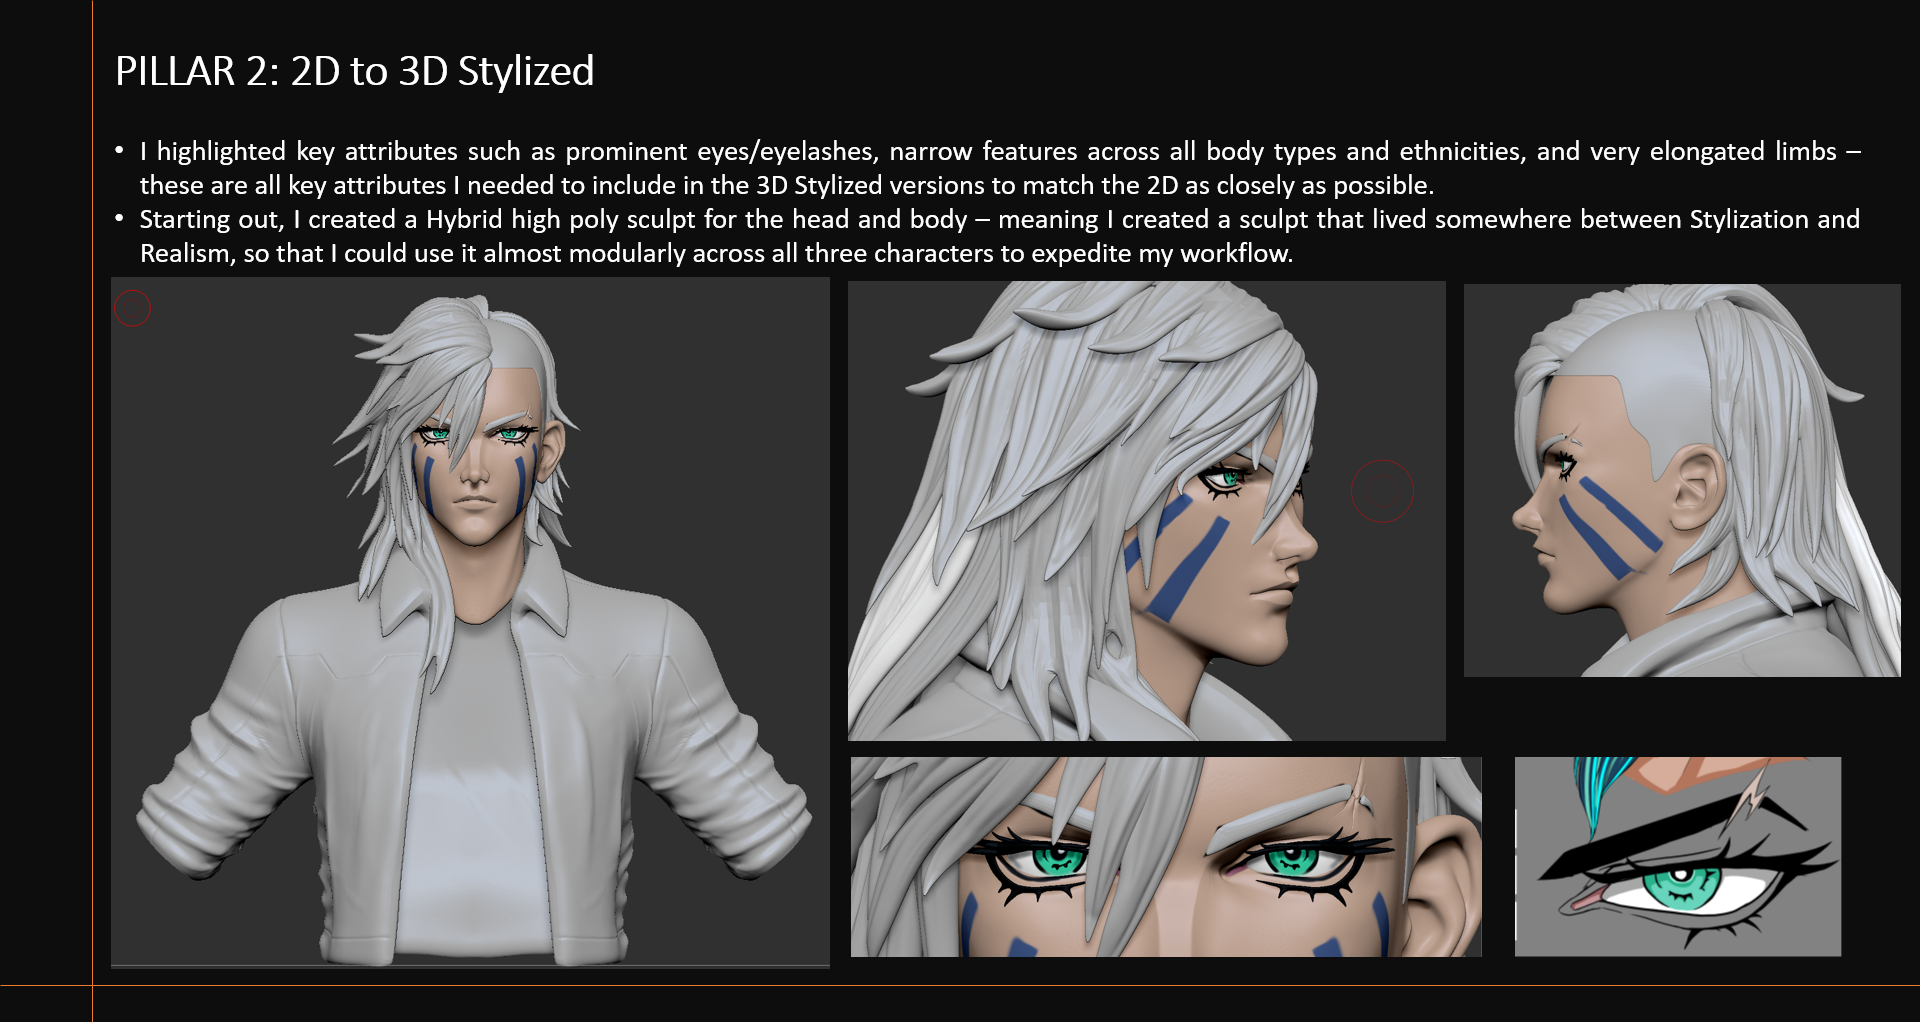
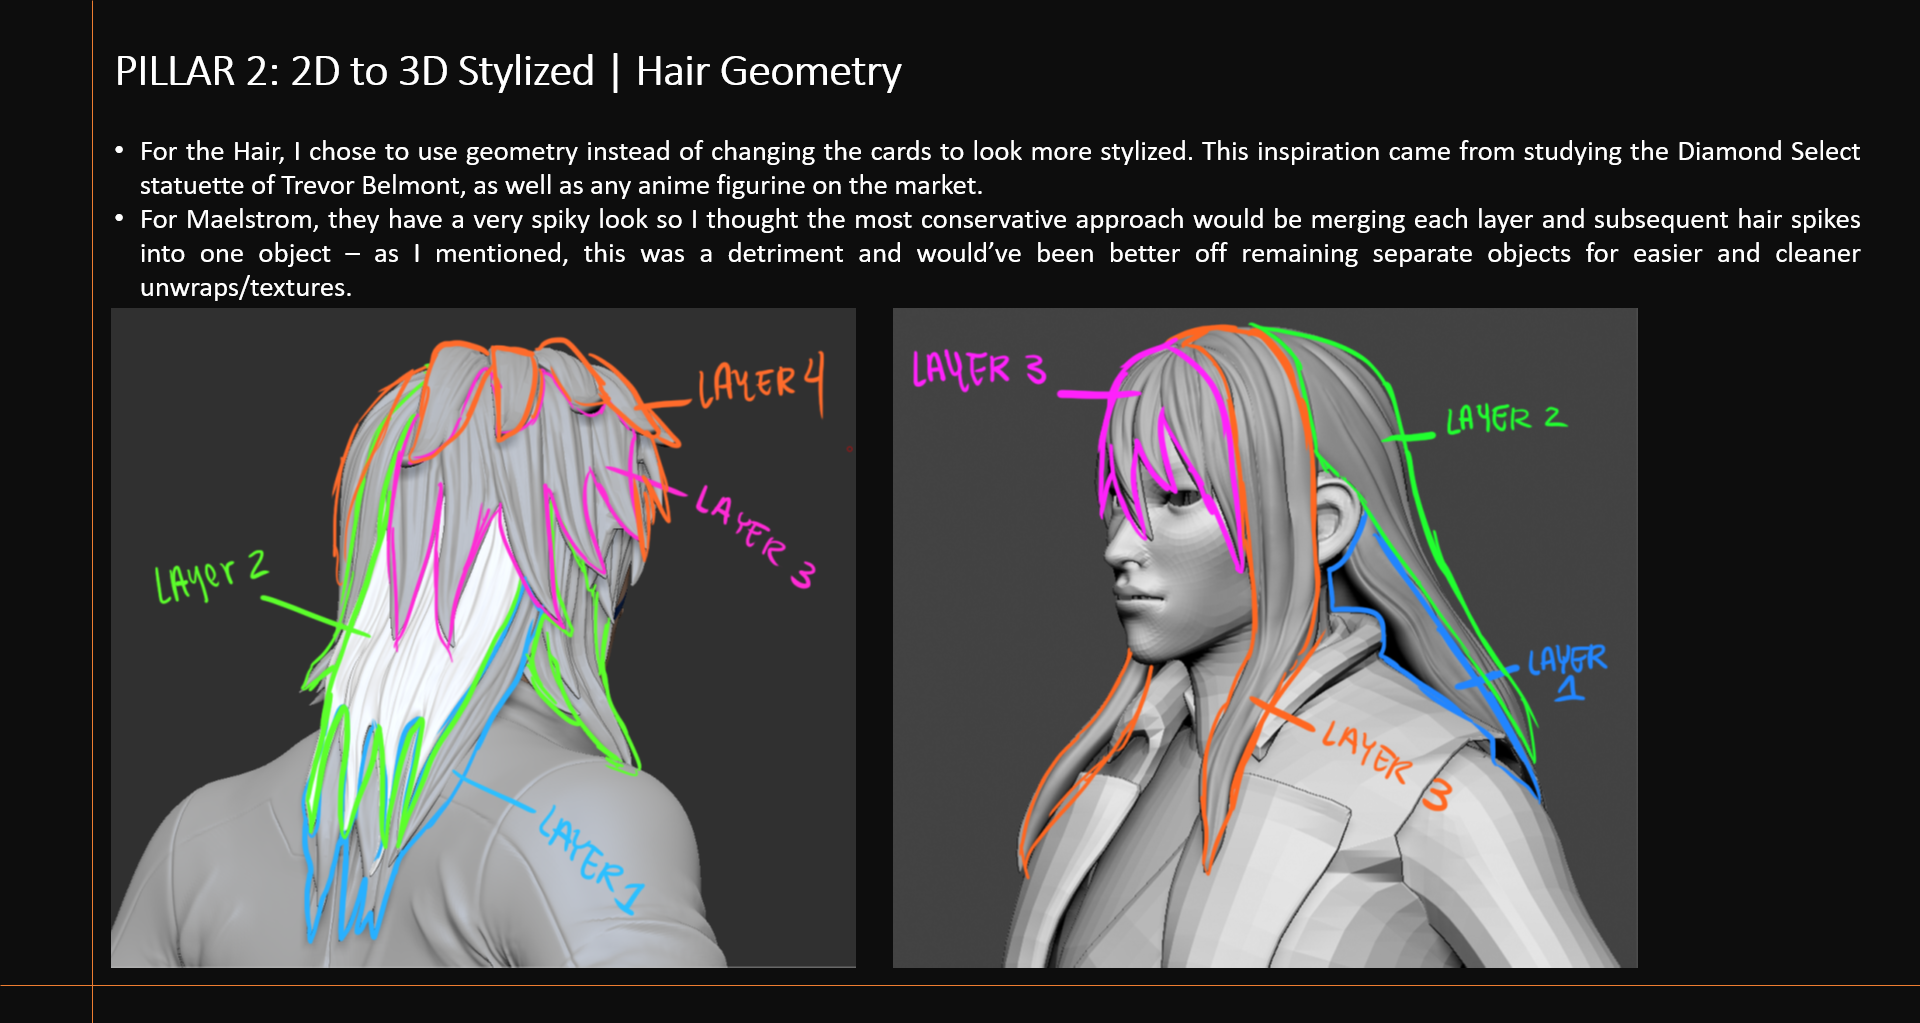
Translating my 2D Concepts into Stylized 3D was the most seamless part of this project, as I often work in stylization rather than realism. I created a hybrid high poly that I used for both the realism sculpt and the stylized sculpt, so that I didn't have to start from ground zero at any point. It helped expedite my creation process.
I started with Maelstrom's model, as it had fewer details and I knew I would be able to finish their design first.
PROCESS:
- Used the Retopo'd game res mesh for head and body and then used ZWrap to morph the game-res to the stylized high poly meshes
- Export to 3DSMax for setup and scaling
- Complete setup and apply MSO
- Export for Substance Painting
- Tweak Paint Diffuse in Photoshop
- Test materials in Marmoset
- Import and setup in UE4




PILLAR III: Stylized to Realism
Similarly to how I started the Stylized high poly sculpts, I used the hybrid head version as a base for the realistic version. I decided I would fix proportional issues later on with Correctional shapes in ZBrush, and instead put a majority of my efforts into the texturing portion, since this was my first time doing any realistic texturing in-depth.

REALISM REMAKES
Sometime after completing my Vertical Slice for school, I wanted to go back in and remake Maelstrom's Prototype version, for good reason. There were a lot of quality issues with their Prototype model that didn't look great.
Key Issues that were fixed:
- Hair card setup and Textures
- Facial construction
- Eye materials
- Skin texturing
- Clothing quality
- Overall design


FINAL UE4 SETUP


